GRAY MATTER
by WizarBox Production
Walkthrough by MaGtRo February 2011
Gameplay: This is a third person point and click game.
After installation, a configuration frame asks your preference for performance on your computer: resolution, effects, shadows, mirrors, rendering and quality. The selection can be changed in the config app in the installed game folder.
The main menu has new game, load game, options, credits and exit.
The options menu has sound, graphics and controls selections.
The sound option has music, sound effects and dialogue volume adjustments.
The graphics option has brightness, contrast adjustments and subtitle option.
The control option has the mouse button and keyboard adjustments.
The in-game menu is accessed during game play by the ESC key or clicking on the icon at top left of the screen. The in-game menu has resume game, save game load game, options and main menu.
Left click of an item selects and starts an action and right click equip-does-ready the action. The item will be seen at right side of the screen after a right click.
The inventory is accessed by placing the cursor to top of the game screen.
Items can be combined. The combine cursor is a hand with a question mark.
The magic performance cursor is a hat with a wand.
The mouse wheel or page up-down zooms in on a document to get a close up view.
Space bar shows all hotspots in the screen.
The exit icon is at bottom left of screen shown by an open door. This leaves a location or a close-up.
Place the point of the cursor on the active item or label to select it.
Double click makes the character run.
There are 20 saved game slots in the game.
Magic Interface: Sam practices the magic trick first before performing.
1. Once the magic icon is seen on a character - find out what magic trick is to be used.
Left click to select a magic trick in the magic book.
Right click to flip a page in the magic book.
2. Get items needed for the magic trick.
Pick up items from inventory or from the surroundings.
3. Prepare the trick. Do this on Sam's frame at right side of the screen.
Move - left click-hold-drop an item to a slot in preparing magic trick.
Manipulate - Select which of Sam's hand will have that item by left click the manipulate button when Sam is holding it on that hand.
Misdirect - Select-left click the misdirect action.
4. Sequence the trick. This is done on the left side of the screen.
Arrange the sequence of the trick.
Right click to remove-delete last prepared step in the magic trick.
When the sequence is complete, see a wand at bottom of the screen.
Left click to start the sequence.
If a mistake is done, automatically restart from the last correct action performed.
Score: Each chapter is divided in puzzle sets and bonus sets.
You earn points when a puzzle or bonus action is done.
You have to do all the actions needed to finish a puzzle set and get 100%.
You have to complete all the puzzles in that chapter to move to the next chapter.
The progress of the score or gameplay can be seen by using the P key or clicking on the Progress icon (with 3 lines on it) on the cards-mask icon at top left of the screen (left of inventory).
Map: M key or click on map opens the map found under the progress icon on the cards-mask icon at top left of the screen (left of inventory).
Select the place you want to go to or jump to in the map.
White location is a new place.
Gold location still has a puzzle or bonus action to be done.
Silver location still has bonus action to be done.
Gray locations are finished locations.
A motorcyclist drives on a country road on a stormy night. The cyclist checks the map to find the way to London.
The strong wind turns a signpost around and points to the wrong direction. The motorcyclist checks the signpost and drives the wrong road. The motorcycle breaks down.
The motorcyclist stops by a high wall of a manor. A woman arrives and practices announcing that she is the new assistant of Dr. Styles. A bat dives at her and scares the woman. She drives away.
Samantha Everett sees this opportunity to get out of the storm and rings the doorbell stating she is the new assistant. The plaque states that this is the Centre for Cognitive Analysis.
Chapter 1
Houdini's habitat (Tutorial):
Sam's bedroom: The inventory has Sam's diary. Left click to read the diary. It has dialogue heard and when the picture is clicked on, the cutscene is replayed.
Look around and left click on all active items. Press the space bar to see all active items.
Pick up Houdini the rabbit in front of the plant and side table (see his ears). Sam places the rabbit in his cage.
Open the backpack at foot of the bed. Take the carrot and the empty water bottle. Click on door icon at bottom left to exit the close up.
Take-right click the carrot in inventory and give-left click the carrot to Houdini.
Click the empty water bottle on the water pitcher on the side table to get full water bottle.
Use full water bottle on Houdini's cage.
Dread Hill House:
Items: Open the backpack again. Check all the contents. Learn that Sam is an orphan from America.
Take deck of cards, wallet, matchbook, Swiss army knife and Magic Handbook.
Exit the bedroom to go to upstairs hall.
Upstairs hallway: Sam wants to find a map to know where she's going.
Look around at upstairs hallway. Go to foyer.
Foyer: At the stairs, check the portrait of a beautiful woman.
Look around at the foyer. Check the new assistant envelope on the door left of the stairs.
Parlor: Enter the parlor right of the stairs. Look around.
Look close and check and read the diploma on the wall and learn Dr. David Styles is a neurobiologist.
Look close and check the picture of couple on the table below the diplomas.
Look close and check the photos of patients in front of the anatomical statue.
Check everything on the computer table. Exit the parlor.
Dining room: Look around. Check the Hi-fi and watercolors.
Front Entry: Go to front part of the house.
Look close and read the entry plaque by the door twice - Centre for Cognitive Abnormality Research.
Garage: Go to Back Exterior and check the statue and tower.
Enter the garage. Check the paintings and the car.
Check the bike. See that it doesn't work.
Mrs. Dalton: Go back to the house. Meet Mrs. Dalton. She has breakfast ready for Sam.
Go to the kitchen. While eating, talk to Mrs. Dalton completely until no dialogue is available.
Learn about the bus stop, the Centre, patients, Dr. Styles, portrait, London, Oxford and the job-pay of the assistant.
Look around the kitchen before exiting the room.
Note that the notice board has an out of date calendar - December 2002.
Foyer: Now that Sam has decided to stay and work here - check the new assistant envelope on the door.
Dr. Styles needs 6 student volunteers for tonight. Check the leaflets behind the note. Dr. Styles will pay volunteers 15 pounds per hour.
You need a cell phone to leave with Mrs. Dalton.
Kitchen: Go back to the kitchen. Talk to Mrs. Dalton about the cell phone. She gives her cell phone for Sam to use.
Bedroom: Climb the stairs and enter Sam's bedroom.
Open the backpack and take Sam's parent's photo. Sam automatically places it on the side table. Now it's home.
Outside: Exit the house. Outside, exit at right of the screen.
On the map, select Oxford Town Centre.
The Betrayer's Price:
Oxford Centre: Look around. Check the Carfax Tower, phone booth, steam vent and Coat of Arms plaque. Learn that each college has its own coat of arms.
Black Wand: Exit to Cornmarket Street at right. Look around.
Check the Black Wand, a magic shop. Enter the shop and look around.
Check Houdini's picture and the game machine below it. Examine the game machine and see that it has the Daedalus logo at the base.
Mephistopheles: Mephistopheles appears. Talk to him completely. Lady Byron is Sam's stage name.
Learn about the Great Scarpelli, Daedalus club and how to become a member.
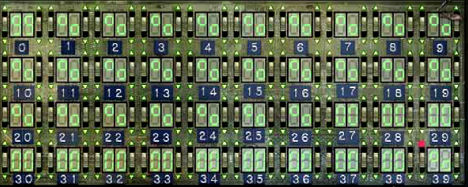
Game machine: Look close at the game machine again and play the game.
Press the buttons under the cards. The object of the game is to get 21 or a face card and an ace. That's it.
Pick up The Betrayer's Price riddle at right side of the machine. Read the riddle.
Talk to Mephistopheles again. Learn about the scholar's heart and winning.
Shop shelf: Check the shop shelf right of Houdini and the one under the cash register at right. See tricks and items of a magician.
Exit the shop.
The Betrayer's Price
Five pieces of gold
In the scholar's heart
Where: High above and reigning over Queen,
Find room with the view, the Quadrifurcus
Then: Fire, water, earth, wind
And the fifth is at the end,
Where souls choose their fate
All together: They point to a place
There, enter the name
Of the one who sold his soul for thirty.
Carfax: Go back to Oxford Centre or Carfax. Note the name of the street left of the Tower - Queen Street.
Look close again at the Carfax tower sign.
In the scholar's heart
Where: High above and reigning over Queen,
Enter the Carfax Tower top. Check the panorama.
Find room with the view, the Quadrifurcus
Close the door and check the red box. Look close to see that the red box has a Daedalus club logo.
Then: Fire...
Move the cursor and see a vent under the box. Use match under the red box.
The bottom opens. Take the coat of arms paper and piece of gold-jigsaw.
Examine the coat of arms paper and piece of gold-jigsaw in inventory.
Coat of Arms plaque: Exit down to Carfax. Look close again at the Coat of Arms plaque.
Use the coat of arms paper from the red box on the coat of arms of Christ Church. That's it!
Christ Church is now in the map.
Water...
Christ Church College: Jump to Christ Church. Look around. Check the fountain statue, water and the black box.
Check the black box. Click on the gold Daedalus logo. Click the lid to see a litmus paper. Click on the litmus paper.
Move cursor to the side of box and get water from the pool. Take the drop of water from inventory and use it on the litmus paper. It worked.
The litmus paper showed the Christ Church coat of arms. So the next location is still here.
Click on the gold Daedalus logo to open the box. Take the piece of gold-jigsaw.
Earth...
Christ Church Gardens: Go bottom right to the gardens. Look around.
Check the flower beds. Look close at the flower bed at middle bottom of screen.
Move the cursor to the pink flowers just below the statue's face and see that it is freshly dug.
Look close and see a tiny flag with a Daedalus logo on it.
Click several times to dig the fresh dirt. Take the beer coaster and the piece of gold-jigsaw.
Examine the beer coaster in inventory.
Queen Street: Use the map and jump to Oxford Town Centre. Exit to Queen St. Look around.
Windy Dog pub: Look at the sign of the Windy Dog pub. They're closed; so Sam has to check it tomorrow.
Lambs for Dr. Styles:
Lambs: Talk to the boy in front of Alice's shop at right. Sam tries to convince him to be a volunteer.
Talk to the girl left of the Windy Pub. Talk to the boy in red. It seems that finding lambs for Dr. Styles won't be easy.
Sam picks up the freshmen flyer on the road and reads it. Learn that there's a Freshmen Orientation Party at the St. Edmunds Quad.
Get Harvey's cartridge:
St. Edmund Hall: Jump to St. Edmund Hall on the map.
See Harvey and Lisa have an argument.
Harvey: Talk to Harvey Kinderman completely. After blackmailing him to do the research with Dr. Styles, get a spare cartridge.
Lisa: Click on Lisa and then prepare the magic trick.
Select the magic trick: Right click the magic book in inventory and then click on Lisa.
Open the magic book and turn the pages to Up in Smoke trick.
Click on Up in Smoke page to select the trick.
Prepare for the trick: See the screen split into 2 frames.
On the right frame:
Click-hold-drop the spare cartridge inventory on the left sleeve slot at top right of the frame. See that step 1 at left frame states: Load spare cartridge in left sleeve.
Click-hold-drop Lisa's cartridge at environment (bottom of right screen) on right hand slot.
See that step 2 at left frame states: Take Lisa's cartridge in right hand.
Click-hold-drop the spare cartridge to left hand.
See that step 3 at left frame states: Palm spare cartridge in left hand.
Click-hold-drop Lisa's cartridge to left hand slot
See that step 4 at left frame states: Move Lisa's cartridge to left hand.
Click on 'misdirect' icon.
See step 5 at left frame.
Click-hold-drop spare cartridge to right hand.
See that step 6 at left frame states: Move spare cartridge to right hand.
Click-hold-drop Lisa's cartridge to left sleeve.
See that step 7 at left frame states: Vanish Lisa's cartridge in left sleeve.
A magic wand appears when the sequence is complete. Click on magic wand icon to check the sequence.
Watch Sam trick Lisa and gives the cartridge to Harvey.
Get another volunteer:
Angela: Look at; go to and talk completely to Angela who is sitting on the bench by the wall.
Learn that she is home sick and believes in fate.
Select the magic trick: Right click the magic book in inventory and then click on Angela.
Open the magic book and turn the pages to Telephone Psychic.
Click on Telephone Psychic page to select the trick.
Prepare for the trick:
Cell phone: Look close at payphone.
Right click the cell phone and left click the payphone number at bottom of the box. The number is now in the cell phone memory.
Left click to look close at cell phone. Click on right side line.
Use down arrow to highlight options. Click on right side line.
See Mute. Click on right side line to change the Off to On.
Click on red off icon.
Telephone psychic: Right click the magic book in inventory and then click on Angela.
Take the cell phone in inventory and place it on left hand.
Click on Misdirect.
Click on Manipulate left item icon.
Place cell phone on left sleeve.
Click the magic wand to verify the sequence of the trick.
Watch Sam do the magic trick and talk Angela to do the experiment.
Get 2 more volunteers:
Helena: Talk to Helena lounging in the sun. The girl is interested in Charles.
Charles: Talk to Charles. Look at the book beside Charles.
The letter on top of the book is from Gertrude, Charles' mother. The book is Homer's Iliad.
Talk to Charles again. Learn that he can't do anything without asking mother's permission.
Select the magic trick: Right click the magic book in inventory and then click on Charles.
Open the magic book and turn the pages to Ominous Mailbag.
Click on Ominous Mailbag page to select the trick.
Prepare for the trick: Sam says to do the first part of the trick first.
Misdirect.
Click-hold-drop the mail on left hand.
Click-hold-drop the mail on left sleeve slot.
Watch Sam do the magic trick and get Charles' letter.
Use map to go back to Oxford Town Centre. Use Charles' letter on any steam vent.
Look close and read the letter. Read the Health fair flier at the back of the letter.
Use the new assistant envelope from inventory on the Health fair flyer. Sam exchanges the 2 papers.
Jump to St. Edmund Hall. Click on Charles to continue the magic trick.
Click hold drop Charles' letter on right hand.
Misdirect.
Place Charles' letter on environment slot.
Click on magic wand. He's sure to come to the experiment since mommy told him to.
Talk to Helena again. She's coming to the experiment.
The cell phone rings. Dr. Styles wants you back at the manor. Beside the one volunteer he got and Sam, that makes 6 people for the experiment.
Watch the experiment. A maintenance man is lining the tracks. Something scares him and he runs away. A maze pattern is formed on the tracks.
CHAPTER 2
Strange Events at the Horspath Track:
Sam wakes up very refreshed and goes to the kitchen.
Kitchen: Mrs. Dalton talks to Sam. Someone left a newspaper outside.
Pick up and read the Oxford Student newspaper on the island. Click on the "Prank at the Horspath Track". Someone adorned the track with an elaborate pattern.
Find information about what happened at the Track:
Horspath Track: The track is now in the map. Jump to Horspath Track.
Look at the pattern on the track.
Talk to Eddie. Learn about the wind and dust storm. The lines formed on the track. It happened half past 11. There was also a funnel following the track.
Find out about skilled magicians around here:
Oxford Town Centre: Jump to Town Centre. Talk to Woman Selling flowers. Sam automatically buys flowers.
Black Wand Shop: Exit at Cornmarket St and enter the Black Wand Shop.
Talk to Mephistopheles completely. Learn about grand games.
Sam gets carded:
St. Edmund Hall: See the student volunteers. They exchange cell phone numbers and talk about the experiment.
Sam is to check more about the experiment and Dr. Styles at the library. She will meet them back here at noon.
Bodleian Library: Jump to the library. Sam finds out that she needs a student ID to use the library. Look around.
Helena: Talk to Helena sitting at front table. Learn that she has 2 IDs because the first one is hideous.
Helena shows both ID. Select 3 bad comments for Helena's old ID card. Select 3 good comments for Helena's new ID card. Helena takes the cards and sits down.
Select the magic trick: Right click the magic book in inventory and then click on Helena.
Open the magic book and turn the pages to The Destroyed and Restored Ring trick.
Click on The Destroyed and Restored Ring trick page to select the trick.
Prepare for the trick: Sam says she needs a noisemaker first.
Jump to Town Centre and then go to Black Wand Shop. Enter the shop.
Look close at the store shelf at right. Pick up the shredded paper noisemaker at middle left shelf. Exit the store.
Jump back to library.
Place the shredded paper noisemaker in the paper shredder beside Sam.
Trick: Use the magic book on Helena to get the preparation frame.
Place the noisemaker remote from inventory on left hand slot.
Place Helena's old ID in right hand slot.
Manipulate Helena's old ID.
Misdirect.
Manipulate left item - remote control.
Place Helena's old ID on right sleeve slot.
Click on magic wand.
Watch Sam do the trick and get Helena's old ID.
Use Helena's ID on the turnstile to enter the library.
The Mysterious Dr. Styles:
Bodleian Library:
Computer search: Talk to the Reference Librarian about Oxford Professors. She refers Sam to the computer.
Go to the computer terminal on the table left of Helena. Automatically a search is done.
Click on the dates at left and read the newspaper articles. Learn how popular Dr. Styles was.
An article "Extraordinary Powers of Ordinary Minds"" is not available.
Learn about the romance between Dr. Styles and Laura Edmonthorpe and subsequent wedding at Westminster Abbey in 1998.
Sam reads about the car accident that killed Laura on 23, October 2002.
Sam gets a flashback of when she was a child waiting for her parents and taken by the State.
Talk to the Reference Librarian about the not available Scientific American article. There are 2 journals but both are missing.
Dread Hill House:
Jump to Dread Hill House.
The phone rings. Sam answers the phone and fields the question about a new assistant.
Mrs. Dalton: Go to the kitchen. Now we know why the calendar on the noticeboard is on October 2002.
Talk to Mrs. Dalton.
Sam's bedroom: Go upstairs to Sam's bedroom.
Use the wild flowers on the glass beside the photo of Sam's parents.
Sam plays lab assistant:
Basement Hall: Go down to the Basement Hall. Look around.
Main lab: Enter the main lab. Look around.
Look at the desk at left. Use the wild flowers on the dead roses on a vase beside the photo of Laura.
Check the appointment book beside the picture.
Read the Note of Instructions left by Dr. Styles.
Read the note from Susan Whittier of Oxford Radcliffe Hospitals. She wants the contractor's report of the donated equipment.
File cabinet: Go to the file cabinet beside the exit door. See a close up of the instructions and the folders to be filed.
File: File folder by the first letter except for his publications which should be filed under P and those about Oxford to be filed under O.
Click on the file cabinet the folder is to go in to.
MRI, Published 1999 is to go under P.
Search: After filing, click each cabinet to check the contents.
Under E, check-read the Scientific American article "Extraordinary Powers of Ordinary Minds".
Under F, take the fMRI delivery (donation) receipt.
Under F, read the Linkweller article.
Under N, take the Neurobiology Dept. Staff (phone) List. It has the names and office and phone numbers of the Staff in 2001.
Radcliffe Infirmary:
Jump to Radcliffe Infirmary. Look around.
Enter Susan's office. Talk to Susan. Sam gives the receipt. Talk to Susan again to get to talk to Mr. Headley.
Learn from Mr. Headley that Styles had to submit an experiment plan. There are people that are jealous that might spread the rumors about Styles.
The Mysterious Dr. Styles (continued):
Talk to Susan after learning about enemies and experiment plan from Mr. Headley.
After telling Susan about the coffee, Susan takes the key to the file cabinet before she leaves.
Select the magic trick: Right click the magic book in inventory and then click on Susan.
Open the magic book and turn the pages to Bottomless Cup Trick.
Click on Bottomless Cup page to select the trick.
Prepare for the trick:
Items: Go to Black Wand Shop at Town Centre.
Buy a classic hand magnet from the shop shelf at right.
Exit the shop to pay Mephistopheles. Jump back to Radcliffe Infirmary and Susan's office.
Trick: Click the magic book on Susan.
Place the magnet at right hand slot.
Place the cup on left hand slot.
Place the cup from left hand with magnet at right hand slot.
Manipulate right item.
Misdirect.
Place cabinet key in left hand slot.
Place cabinet key in left sleeve slot.
Click on magic wand.
Watch Sam do the trick and get cabinet key.
Select the magic trick: Right click the magic book in inventory and then click on Susan.
Open the magic book and turn the pages to Super Gross Out Self Healing Wound trick.
Click on Super Gross Out Self Healing Wound page to select the trick.
Prepare for the trick:
Items: Go to Black Wand Shop at Town Centre.
Buy stage blood from the shop shelf beside Houdini.
Buy false thumb and spirit gum from shop shelf at right.
In inventory, select and combine fake thumb with fake blood.
Select and combine fake thumb with blood with spirit gum.
Exit the shop to pay Mephistopheles. Jump back to Radcliffe Infirmary.
Enter the Staff kitchen at right. Look around.
Take the first aid kit and Sam automatically hides it behind the silver tray.
Trick: Go back to Susan's office. Right click the magic book in inventory and then click on Susan.
Place letter opener on left hand slot.
Manipulate left item.
Misdirect.
Manipulate left item.
Click on magic wand.
Watch Sam do the trick and Susan leaves the office.
Use the cabinet key on file cabinet.
Use the Experiment plan on the copying machine. Sam leaves the office.
Mohka Malik: At the hallway, Sam stops Malik. Talk to Malik completely to discuss Styles and the imagining exercise.
In inventory, read the Experiment plan. Read about the 6 athletic locations to be visualized in the experiment.
Dread Hill House:
Jump to Dread Hill House. Go down to Main lab at Basement Hall.
File cabinet: Check the file cabinet.
Under C, read the Condolence Card. Click the card to open and it and see the signature from the Neurobiology department.
Take the phone list from inventory and use it on the open condolence card.
See another frame; click the names on the list at left when a corresponding signature on the card is found.
See that the only one left is Styles and Abram Linkweller. Linkweller must be the enemy.
The Betrayer's Price (Part 2):
Jump to Town Centre. Exit to Queen's Street.
Wind
Windy Dog Pub: Check the sign and enter the pub. Look around.
Talk to the bartender.
Look at the hunting horn on the pedestal.
Click on the horn cap to try to blow on it. It doesn't make a sound.
Talk to the bartender again about the horn. He gives the mouthpiece.
Look close at horn again. Use the mouthpiece on the horn. Sam automatically blows on the horn.
Sam asks for the piece of gold. The bartender gives a postcard of The trial of Archbishop Cramer - Christ Church Cathedral and the jigsaw-piece of gold.
Christ Church Cathedral:
Jump to Christ Church. Enter the Cathedral Nave at right.
And the fifth is at the end,
Where souls choose their fate
Talk to the Guide. Learn about the triptych on the altar that depicts Judas the Betrayer.
Altar: Go to the altar area. Check the baptism pool on the floor.
Check-pull the switch at left side of the window.
The baptism pool cover slides back. Take the baggie to get another jigsaw-piece of gold.
All together: They point to a place
Jigsaw: Look close at the jigsaw and put them together.
Left click the pieces to select and right click to turn. Left click-hold to move it in place.
Ideogram: Add or subtract the words to form the location.
Car + axe + F = Carfax
Flower - Fl + T = Tower
Bone - B + PH = Phone.
Carfax:
There, enter the name
Of the one who sold his soul for thirty.
Jump to Tower Centre. See the red phone booth by Carfax Tower.
Enter the phone booth. Pick up the receiver.
Enter JUDAS - click the numbers 58327. Congratulation on mastering the game. Here's your reward.
Take the coin. See that one side has the House of Parliament and The Betrayer's Price. Turn the coin around and see St. Paul's Cathedral.
Exit the phone booth.
Lambs Club: Sam goes back to the rest of the volunteers. The Lambs Club is formed. Sam defends Styles forcefully.
David Styles dreams.
CHAPTER 3
That Piece of Junk:
Inventory has David's diary, wallet and private lab key.
David's bedroom: Look around in the bedroom. Everything reminds him of Laura.
Exit the room and go down to the stairs. Look at Laura's portrait.
Kitchen: Talk to Stella Dalton about "that girl" and unusual occurrence.
Garage: Exit the house and go to the garage. Look around.
Check the Motorbike twice.
Kitchen: Go back to the kitchen and talk to Stella again about the bike.
David tells Stella to have the bike repaired.
A Spectral Presence:
Remember that Stella mentioned something about seeing a woman in the bedroom mirror.
David's bedroom: Go back upstairs to David's bedroom.
Look and click on the mirror before the bathroom door.
Go downstairs and then to basement hall.
Main lab: Check the file cabinet and David praises Sam's work.
Private lab: Use private lab key on private lab door. The doorbell rings.
Go upstairs and pick up a delivered package. Automatically, David is inside the private lab.
Check and read the whiteboard. It has all the unusual occurrences connected to Laura.
Click on the computer twice to review the video logs.
Click to select Video logs on the monitor. Check all 5 video clips. Close the screen using the X at top right and select another clip. In the 8 Aug '05 clip, Laura is supposed to be 33. She was then born in 1972.
David is determined to keep Laura's presence in the house and give her more energy to prolong her stay.
Psi and Psi again:
The dialogue generator is delivered.
Look close at the work counter. Read the letter from Ramusskin. Ramusskin says to connect the RNG motor to his invention.
Read the Psi book beside the letter.
In page with I page marker, learn about telepathy, precognition and telekinesis. RNG or random number generator gets the highest psi results.
Click on tabs on top of the book to move to that page.
In page with II page marker, learn the use of a rolodex with the RNG motor and the settings of the RNG motor.
Adjust the settings: Look close at the machine right of the desk to see the numbers board.
Based on the psi book, change the above 0 to 39 numbers.
Change the numbers by clicking on the arrows at either side of frame to turn the wheel.
0 should be 99.
#1 to 26 are not to be changed - as is %.
#27 to 39 are to be changed to 00 (click the left top arrow once). It seems to be correct.
In far view, click the red button at right side of the machine.
Click on the machine to verify that it is correctly set.
David is waiting for Laura to communicate. Click on the Rolodex to see if a message is received. IM is seen.
Memories of a Summer's Night:
Check the tank lid. He will have a session today but first David wants to collect items to strengthen memories of Laura.
Five senses:
Sight: Go to the parlor. Look around.
Look close at the box of photos right of the computer. Look through pictures.
They had their honeymoon at Loire Valley. A picture was in Ste Benoit la Foret.
David selects the picture of the cottage. David decides this is the place to recreate a memory. David enhances a memory.
Sound: Exit the parlor and enter the dining room across the hall. Look around.
Look close at the Hi-fi system left of the door. Look for the music they played at the cottage.
Take the green Scarlet Furies Music CD on bottom middle shelf. David enhances a memory.
Smell: Go up to David's bathroom. Open the cabinet right of the mirror.
Take the shampoo from middle shelf. David enhances a memory.
Touch: Go to David's closet. Check Laura's white dress.
Look close at the dresser at end of the closet. Open all 3 drawers. Click on clothes in each drawer.
Take the swimsuit under the bathrobe from the bottom drawer. David enhances a memory.
Taste: Go down to basement hall. Click on wine rack. David says to pinpoint which wine.
Enter the private lab. Look close at the computer.
Click on Wine Steward. Laura prefers dry reds.
Click on type and select dry on drop down menu.
Click on color and select red on the drop down menu.
Click on year and select '72 - the year of Laura's birth. This is learned from the 8 Aug '05 video clip.
Click on region and select Loire on the drop down menu - the place where they honeymooned.
It narrows down to 3 bottles: 92, 93, 94.
Go to the wine rack at the basement hall. Get a close up of the wine rack.
Click on a bottle at bin 92, 93 and 94. It is 94. David enhances a memory.
Prepare the tank session:
Back at the private lab, click on tank controls left of door. See a close up of the controls.
Music CD: Click the top button on the panel right of the monitor to open the CD tray. Place the music CD on the slot of the player at bottom right.
Shampoo: Pour shampoo on the funnel of machine under the monitor.
Open tank by pressing the bottom button at the panel right of the monitor.
See David drink wine and memories pour.
Blue tiles. Check the cars, David.
A message from Laura:
Blue tiles photo: Go to the parlor and look at the box of photos again.
Check the blue tiles behind the photo of David and Laura taken at the benefit dinner. This photo was taken before the accident.
David says to examine it more closely.
Scanner: Go to private lab.
Use the benefit dinner photo on the scanner. Click on Scan and then edit.
Select sharpen, colors and contrast. Get a close-up of a black smoky shape.
Kitchen: Go to the noticeboard in the kitchen.
Select the business card of Inspector Reginald Paiser. The investigator of the accident.
Learn that the car that hit the Styles has a fused gas pedal.
The next night's experiment shows the Lambs club asking David about the safeness of the experiment. They realize that David doesn't know what happened at the track.
Watch what happens at the swimming pool at St. Edmund. The pool turns red.
CHAPTER 4
There's was Something in the water:
David enters Sam's bedroom agitated. Something happened.
Exit the bedroom and talk to David. He wants Sam to investigate what happened at the St. Edmund's pool.
Kitchen:
Go to kitchen and read the newspaper on the island. Learn that Jeanie Smith was one of the witnesses.
St. Edmund Hall:
Jump to St. Edmund Hall. Enter through lobby door.
Look close at resident board and see that Jeanie Smith is in 106.
Bulldog: Try to climb the undergraduate stairs at left but is stopped by the Bulldog. Use Helena's ID (with Sam's picture) on the bulldog.
Jeanie Smith: Go to room 106. Look around.
Talk to Jeanie. She felt the air fill with electricity. It happened at around 11:30, + 10-15 minutes. There was a shape under the water. It felt evil. The water changed color.
Sam exits the room. Get a cell phone call from one of the Lambs club member to go to the quad.
Pool: Go down and enter the pool.
Talk to pool man. The filter took the dye out.
Look close at the filter taken out of the pool. Check the pool.
Take the Polaroid pictures on the bench at left. The pool is red.
Check the clock. It stopped at 11:42.
Talk to the pool man again.
Exit the building and see the Lambs Club members. They will meet back here again at noon to decide if they will continue with the experiment.
Setting a trap:
Gymnasium: Go back inside St Edmund through lobby door.
Enter the gymnasium right of the pool. Sam says to set a trap here since this is where they are going to visualize weightlifting. Look around.
Check the locker room door. Sam wants to rig the door.
Black Wand Shop: Go to the magic shop at Town Centre.
Look at the store shelf beside Houdini. Buy, flash powder trap to get flash powder, flash powder traps and trigger line.
Exit the shop.
Gymnasium: Go back inside St Edmund through lobby door. Enter the gymnasium.
In inventory combine flash powder and flash powder traps to get trap with powder.
Combine trap with powder and trigger line to get powder and line trap.
Use powder and line trap on locker door.
Check the hours at right side of door. The gym closes at 11.
Click on exit door and Sam places traps on the gym exit door.
There's always a plant in the house:
Black Wand Shop: Go to the magic shop at Town Centre.
Talk to Mephistopheles about what is happening. Sam tells him everything about the incidents connected to the experiments. Sam thinks it's a grand game. Mephistopheles advises to check the other students in the experiment - there's always a plant in the house.
Exit the shop. Meet Harvey Kinderman. He took a picture of Sam coming out of the Shop.
Radcliffe Infirmary:
Mohka Malik: Jump to Radcliffe. Enter Susan's office.
Talk to Susan about Malik. Learn that Malik is Dr. Linkweller's teaching assistant. Remember that Linkweller is David's enemy.
Spy on Linkweller: Check Susan's phone and see the extensions of the others in the department. Linkweller's extension is 11.
Check-click on the Neurobiology number at bottom of the phone.
Right click the cell phone and the left click the neurobiology number at bottom of the box. The number is now in the cell phone memory.
Go to Black Wand Shop at Town Centre.
Buy Telephone (microphone) spy at right side shelf of the right shop shelf.
Exit the Shop. Jump back to Radcliffe.
At the hall, use the cell phone. Press the right line and select contacts.
Press the right line and select the neurobiology dept. Press the green icon.
Dial 11 for Linkweller's office. When Linkweller answers, give any response. He will come out of his office.
Enter Linkweller's office. Use the microphone spy on the phone left of the monitor.
Angela Mulholland: Jump to Christ Church. Enter the Cathedral Nave.
Talk to Angela. Learn where she saw David Styles. She doesn't believe in magic but in fairies.
She gives Sam a paper fairy.
Lambs Club: Jump to St. Edmunds and enter.
Check the resident board again and find out that Helena (102), Charles (204), Harvey (302), Malik (326) and Angela (322) live here. Malik and Angela are graduates. The others are undergraduates.
Climb up the undergraduates stairs. Check the table at left and pink toilet paper. See that Helena's room 102 is locked.
Go forward to end of hall and climb to second floor.
Charles: See the proctor sitting at the sofa. Check room 204. Talk to the proctor.
Card game:
Use the magic book on the proctor. Select, read and click on Divide and Conquer trick.
Use the magic book on him and start playing.
- If there are even number of cards dealt, select the proctor should start. If there are odd number of cards dealt, select that Sam starts.
- Select any prediction card and it is placed on the envelope at bottom of screen.
- Follow the directions at bottom frame.
- If the proctor selects 2 cards and one of them is the prediction card; select the other one.
Play until Sam wins 30 pounds.
The proctor doesn't want to pay and swaps. He opens Charles' door. Enter Charles' room 204.
Look around. Check the Scientific American journal with Dr. Style's article on the right of the monitors.
Check the drawer of the desk.
Look at the photo on side table. It doesn't look like Charles and it was dated a year ago.
Click on photo of Charles again to take the picture as evidence.
Enter Mummy's phone number on the cell phone. Click the cell phone on the phone number.
Exit the room.
Room 202: See that the door of 202 is ajar. Look close and click on the bolt and the knob of the door. Sam says she can set it to not lock.
Harvey: Go forward to end of hall and climb to third floor.
See a proctor across Harvey's room 302.
Knock on room 302 twice. Talk to the proctor twice.
Use the magic book on the proctor. Select, read and click on The Locked Room Mystery trick.
Go to Black Wand Shop at Town Centre. Buy cry for help noisemaker from right shelf.
Exit the shop and come back here at St. Edmunds.
If you have not taken a toilet paper from the table at first floor undergrad hallway, do so now.
In inventory, combine toilet paper and cry for help noisemaker to get wrapped noisemaker.
Use wrapped noisemaker on room 302 door. Sam slides it under the door.
Use the noisemaker remote on the door. Sam moves away.
A cry for help is heard. The proctor enters the room.
Immediately look at the door and click on the knob (bottom part) of the door.
The proctor leaves. Enter the room.
Look around. Check the film gear on the shelf.
Check the screenplay notes on the desk. It's about a disfigured scientist, a Goth girl named Jimmie and brain sucking experiments.
Helena: Go down to the first floor. Check Helena's door.
Push the bucket and Sam enters through the transom.
Sam picks up Helena's room key. Look around.
Check the camera beside the computer.
Check the desk drawer.
Check and click on the box under the bed.
Helena enters the room. Talk to Helena. Tell Helena about all the other volunteers.
She lends the camera.
Dread Hill House:
Jump to Dread Hill House. Go down to Main lab at Basement Hall.
Sam sees a blonde woman in a white dress walk up the stairs.
Hear David call for Mrs. Dalton. David has Houdini.
After Mrs. Dalton leave, David interrogates Sam. Talk about the Lambs Club, the incidents at the track and pool and Lindweller.
C Railer Swoll:
Black Wand Shop:
Jump to the Black Swan Shop at Town Centre.
Game Machine: Now that you have talked to Mephistopheles about finishing the Betrayer Game, use the game machine again.
Press the button until you get a King and an Ace.
Pick up the prize at right side of the machine,
C Railer Swoll
'Twas brillig and the slithy toves
Ore the C Railer Swoll
It all began with a Ceshire Chat
At Alice Liddell's pohs
Do-Do-Dogson cracked his geg
And the Queen screamed "Off with their shade."
The dogs on fire ate their nackss
Down necks as long as chistney macks
Find Alice - she is close at hand
Follow well her zage
Then find the rabbit if you nac
And enter the name of the mage
Alice's Shop:
Go to Queen Street down the far end of the road outside the shop.
'Twas brillig and the slithy toves
Ore the C Railer Swoll
It all began with a Ceshire Chat
At Alice Liddell's pohs
Enter Alice's Shop at the corner. Look around at everything.
Click on the Mad Hatter poster.
Look close at Cheshire Cat. See letters on his teeth.
After seeing the Mad Hatter poster, press in SMILE.
Take the piece of gold-jigsaw and ticket to the Museum of Natural History.
Look close at the rack at right. Check all the postcards: long neck reference and Dodo bird.
Take a map of London.
Read the History board left of the postcards. Lewis Carroll (C Railer Swoll) is the pen name of Charles Dodgson.
Talk to sales clerk.
University Museum:
Do-Do-Dogson cracked his geg
And the Queen screamed "Off with their shade."
Jump to the University Museum. Look around.
Dodo bird and egg: Check the Dodo bird and the Dodo egg.
Look close at the Dodo egg and see a Daedalus logo.
Take the Dodo egg. How do you open an egg?
Use the egg on the bench behind the skeleton. Sam sits on it. Man, do I feel stupid.
The egg opens. Take the piece of gold-jigsaw and invitation to Hogwarts School of Witchcraft and Wizardry.
Place the egg back on the case.
Bodleian Library:
Jump to library. Use Helena's ID on turnstile.
Talk to the reference librarian about Hogwarts. Learn that Hogwarts dining hall was patterned after Christ Church Hall.
Christ Church:
Jump to Christ Church. Check Christ Church Hall at corner.
Sam reads that the dining room is closed for painting restoration.
Sam will continue the game tomorrow.
There's always a plant in the house (continued):
St. Edmund Hall:
Jump to St. Edmunds.
See the Lambs Club. They will do a silent vote on continuing or not with the experiment.
Use the magic book on any volunteer. Select, read and click on Fruit Bowl trick.
Watch the vote.
David is in the shower. A mist comes in through the door. The soap is marked. David looks at his body in the mirror.
CHAPTER 5
David's room:
Enter the bathroom and check the shower.
Enter the closet and check Laura's white dress. It is missing.
Psi and the Mind:
Private lab:
Go down to the private lab.
Check the whiteboard to update it.
Read what to do today:
Appt with Dr. Ramusskin.
Check the RNG device.
Repeat memory exercise with Laura.
Check the RNG device: Look close at work counter and see that the RNG rolodex has now IMPO. Click on RNG rolodex.
Dr. Ramusskin's house:
Jump to Dr. Ramusskin's house. Talk to Dr. Ramusskin about everything.
Learn about the elemental manifestations as shown by the shaman example. The shaman can burn people.
David refuses to acknowledge that spirits should move on but is determined to keep Laura's spirit in heart and mind or maybe physically.
A day in a rowboat:
Dining room:
Look at the watercolors done by Laura on the wall. They were done in Timmons Park.
That is the place he will recreate a memory.
Kitchen:
Talk to Stella about Laura's favorite places. Learn about Laura's places in the house, cottage and Timmons Park.
Timmons Park: Jump to Timmons Park.
Entrance Area:
A little girl calls David a monster. Check the entry plaque left of the gate.
Enter the park. Look around.
Check the trees right and left of the bench.
Check the signpost.
Touch: Go to the tree right of the signpost and see a heart with L+D.
Click on tree for David to touch and enhance a memory.
Gardenia Garden:
Go right to the Fountain area. Look around.
Go right to the Gardenia garden. Look around at the bushes.
Check the bush with a gardenia in bloom. Take the gardenia bloom but is stopped by the gardener.
A child comes, picks the flower and runs away.
Playground:
Smell: Go left to the playground to follow the girl.
Talk to the little girl. She wants to touch the mask. She wants David to remove the mask to see the owie.
David moves under the tree. An apple drops from the tree and hit David.
Pick up the apples and show it to the little girl. David juggles the apple. Mommy arrives and takes the girl away.
The girl leaves the gardenia. Pick up the gardenia. Smell it in inventory and enhance a memory.
Taste: Talk to the ice cream vendor. Buy ice cream and get Orange Mivvi ice cream.
Taste it in inventory and enhance a memory.
Boat House:
Exit through bottom path to get back to the bench and bridge.
Cross the bridge to be at the boathouse. Look around.
Sound: Check and talk to the accordion player.
David requests a song - Santa Lucia.
Memory exercise: Talk to rental boat clerk. David rents a boat.
In the boat, memories are recalled. A student, David. 21st of October.
What happened the day before:
Private lab:
Go back to Dread house. Go to private lab and check the 2002 appointment book.
See that there was a dinner appointment with the Helborns at the night of October 21st.
Click on Helborns/dinner. David suffered memory loss after the accident and Simon might help.
Kitchen: Look close at the noticeboard. Check the calling card of Dr. Simon Helborn, a psychologist.
Foyer: Use the phone at the foyer. Veronica answers the phone.
Simon Helborn's Office:
Jump to Simon's office. Talk to Simon. He says to try hypnosis.
Select - Took a shower.
Select - Had breakfast with Headley. Slowly the memory gets clearer.
Select - A coffee shop. Remember Headley talk and lecture.
Select - Neural connectivity in infants. Recall the lecture embarrassment.
Select - Office hours. See a shadow wild figure.
Select - female. The female student said that she has this power. She thought David would understand.
The Experiment:
Private lab:
Go back to Dread house. Go to private lab and check the computer.
Open My Files and read Sam's Experiment report 1 about the incidents.
The Horspath Track incident was at around 11:30. The Pool incident was around 11:40 and 11:45.
Main lab:
Go to Main lab. Go to the far end of the hall to be in the main lab.
Check the computer.
Session 1: Select session 1. David says to be at specific time. The time is 11:20.
Click on + square until the time is 11:30. Then click on 45 seconds.
All the scans show red. Click on a volunteer's scan. Switch to MRI main view.
Session 2: Select session 2. The time is 11:20.
Click on + square until the time is 11:42. Then click on 30 seconds.
All the scans show red. Click on a volunteer's scan. Switch to MRI main view.
David realizes that it happened both nights and so not glitch in program.
Kitchen:
Go to kitchen and talk to Stella Dalton about Sam.
The experiment was performed without Sam.
Sam is waiting at the gymnasium. Sam witnesses the third incident and got some pictures.
She is injured.
CHAPTER 6
David calls to Sam. Houdini was found in his bedroom again.
David wants to take Sam to the hospital because of the goose egg she has on her head.
David asks Sam to check up on Angela and Helena.
Investigating the Lambs Club - Take 2:
Exit Dread House through the front door. Outside hear the phone ring.
Listen to the tapped conversation between Linkweller and Shelly, one of his students. Aha.
Radcliffe Infirmary:
Enter Linkweller's office. Sam threatens Linkweller. She wants Linkweller to stop spreading the rumors about Styles. It seems that he doesn't know about Malik's involvement with the experiment.
Charles Effington:
Go to Christ Church. Go right to the gardens.
Talk to Charles completely. He doesn't know Magic. He's an only child. Go one screen away from Charles.
Call Charles' mom. Look close at cell phone. Click on right line, select contacts, right line, Charles' mum and green call icon.
Talk to Charles' mom and find out that he became a hunk since last year.
Harvey Kinderman:
Jump to Bodleian Library. Use the ID card on the turnstile.
See and talk to Harvey at middle table. He's working on a legal brief.
See the magic icon on Harvey.
Prepare trick: Use the magic book on Harvey. Select, read and click The Shredded and Restored Newspaper trick.
Go to reference librarian desk and pick up paper stack.
Perform magic: Use the magic book on Harvey.
Place the paper stack on left sleeve slot.
Place Harvey's paper on right hand slot.
Place the paper stack on left hand slot.
Place the Harvey's paper to left hand slot.
Misdirect.
Place the paper stack to right hand slot.
Place the Harvey's paper on left sleeve slot.
Manipulate right item.
Sam talks to Harvey. Sam is convinced he is not part of the incidents or a magician.
St. Edmunds Hall:
Bulldog: Jump to St. Edmunds. Enter the lobby and is stopped by the bulldog. He wants to check Sam's ID.
He reads it as Helena Beaugard. When he was going to check on the computer, Sam smoothly diverts his attention.
See Angela sitting on a bench by the entrance to pool. She comes out when Sam climbs to the first floor hallway. She approaches the bulldog.
Entry to Graduate side:
Go to third floor hallway. See that the connecting door to the graduate side has a red blinking light-alarm above the door.
Fuse box: An electrician is working on the fuse box down the hall.
Look close at fuse box. Click on the switch left of the red sign at top to know that it controls the alarm.
Look at and pick up the cups and ball on the floor.
Use the magic book on the electrician now that you know about the alarm switch.
Select the cups and ball trick at end of the book.
Click the magic book on the electrician.
Sam instructs the electrician and he does the trick.
At start of the trick, take note of where the cup that is marked is located.
Select the correct cup.
If the cup that is marked is still in the same place, chose it.
If the marked cup is not where it is at start and an unmarked cup is in its place; chose the other unmarked cup.
As a swap, distract the electrician by close your eyes to count to 100.
While distracted, look close at fuse box and flip the alarm switch.
Enter the door to the graduate side now that the alarm is off.
Mohka Malik:
Meet Malik at the hallway outside his room 326. He was just fired. He needed the money so he can continue to study and not ask help from his parents. He didn't like working for Linkweller anyhow and came here to study with Styles before his accident.
Angela Mulholland:
Knock on room 322. Talk to Kelly, Angela's roommate.
Sam wants Kelly out of the room so she can search the room.
Use the magic book on Kelly. Search the book for the right magic and then click to select it.
Chose The Last Great Disappearing Ink trick.
Jump to Black Wand Shop.
Mephistopheles: Mephistopheles gives Sam a Magic Lantern.
Buy disappearing ink from the store shelf right of Houdini.
Exit the shop to pay.
Helena: See Helena come in and then out of the Black Wand Shop.
Jump back to St Edmunds. Go up to the third floor and then to through the graduate door.
The electrician is still doing the swap request.
Go back to room 322.
Do the Last Great Disappearing Ink trick on Kelly.
She leaves to wash her sweater.
Search the room. Check the drawer and see the magazine with Laura and David's wedding article.
Check the Student Record - Enrollment form for a nursing course behind the magazine and see that she is a brunette.
Check the shelf and see fairy statues.
Look at the top of the dresser and click on Angela's father's photo, the 2 scenery photos and blonde hair color.
Learn that Angela's father died in a fire.
Exit through the door. Go through the graduate door and then down to 1st floor hallway.
Helena Beaugard:
Use Helena's key on room 102. Look around.
Look at and then take the hairpin at makeup table at bottom left.
Check the theatre program from the round glass table. It is a London magazine October 2002 - the time of the accident.
Check the drawer and see her acceptance letter dated last month September 2005.
Check the box under the bed. Use the hairpin on the lock. See that it is a box of drugs and syringes.
Dread Hill House:
Go back to Dread Hill. Go to Main Lab. (You might see Mrs. Dalton and Dr. Helborn at the basement hall.
After the talk with Dr. Helborn, enter the Main lab.)
Talk to David standing by the computer. Report about Angela and Helena.
The Ghost of Dread Hill House:
See Mrs. Dalton and Dr. Helborn downstairs. Helborn comes out of the private lab.
After Mrs. Dalton leaves, Dr. Helborn talks and gives a demonstration to Sam.
Sam takes the piece of paper that Dr. Helborn got from the private lab. Sam reads it. It is David's notes about Laura haunting.
Check the house:
Kitchen: Check the kitchen. Talk to Mrs. Dalton about the bike.
Upstairs hallway: Go upstairs hallway and look around for mechanisms. Check the cabinet, gargoyles, chairs, painting and monk.
Go downstairs.
Garage: Go to the garage at back of house. Check the motorbike. It works.
Tower: Check the statue by the tower door.
Try to enter the tower since it is opposite David's bedroom.
Click on bottom of tower door and then check the statue again to get tower key.
Use tower key on door.
Check the path of the stairs. Everything is dusty except for the center part of the stairs.
Go to top of tower. Check the chair that is not dusty.
Look through the window and see David's bed. There's a smudge on the window pane.
Altering the Plan:
Kitchen: Talk to Mrs. Dalton about David, the bike and tower key.
Take flour from behind Sam.
Tower: Use the tower key to enter the tower again.
Climb up to top of tower. Look through window.
Use flour on smudge on window. It's small - from a female.
Exit the tower.
Mephistopheles: Go to Black Wand Shop at Town Centre. Talk to Mephistopheles.
He advises to change the time of the experiments after Sam told him about the weight room.
David: Go back to Dread House and Main lab. Talk to David about change of time.
He says to think of a new location and inform the students.
Horspath Track: Jump to Horspath track. Talk to Eddie.
Get Eddie's cell phone number. Pick up a discus.
David: Go back to Dread House and Main lab. Talk to David about the discus. Sam gives him the discus.
He agrees to do the Horspath discus experiment.
Mephistopheles: Go to Black Wand Shop at Town Centre. Talk to Mephistopheles.
Sam tells him that David refused to change the time of the experiment.
Lambs Club:
Call Helena to confirm same time of experiment.
Jump to St. Edmund Hall and see the Lambs except Helena and Harvey.
Sam tells them the change in time of experiment. Charles will tell Harvey.
C Railer Swoll - Part 2:
Daedalus invitation: Go back to Dread House. Pick up the Daedalus invitation beside the telephone at the foyer.
Check the invitation in inventory. There is no address on the invitation. Sam has to figure out where to go.
Christ Church Hall:
The dogs on fire ate their nackss
Down necks as long as chistney macks
Enter the Christ Church Hall. Look at everything.
Go to the right side of the room and see the fireplace.
Click on the certificate above the fireplace.
Firedog: Click on the firedog in the fireplace. See where the long neck idea in Alice's story came from.
Click twice on the hat of the right firedog. There's a Daedalus logo on it.
Click twice again on the hat and it will twist off. Take the piece of gold-jigsaw.
Find Alice - she is close at hand
Follow well her zage
Painting: Go back to the left side of the room and click several times on the painting of 3 girls.
Get a close up of the painting. Check the title of the painting - The Liddell Sisters.
Click on the red Daedalus logo at bottom right of the painting.
See where the girl at right is looking at. Check the book in the painting.
Use the pocket knife on the book several times until you get a piece of gold-jigsaw.
Jigsaw: Look close at the jigsaw in inventory. Put them together.
Left click to select and right click to turn. Left click-hold to move the pieces.
Cry + ST = Christ
CH + fur - f + CH = Church
Bed - B + M = Med + Os = Meadows
Christ Church Meadows:
Then find the rabbit if you nac
And enter the name of the mage
Search for rabbit: Exit and go right to the gardens. Go right (or left) to the meadows.
See an inset-close up of the ground. Click it to get Sam to walk around. Watch to see if there is a hole in the ground.
Sam will stop and look at it. (I found it to the left side of the meadow; close to the left fence and the corner.)
Rabbit hole: Click the hole to enter it.
See a white rabbit. Enter the name - LewisCarroll or press 539472277655.
Take the coin with British Museum on front side and Buckingham Palace on the back side.
Find the place of the Daedalus club:
Check the C Railer Swoll coin and see that it has British Museum on front side and Buckingham Palace on the back side.
Check the Betrayer's coin and see that it has House of Parliament and St Paul's Cathedral.
Look close at the London Map taken from Alice's shop.
On the London Map, click on British Museum, Buckingham Palace, House of Parliament and St Paul's Cathedral to circle them in red.
Click and hold to connect Buckingham Palace and St Paul's Cathedral. A red line is made.
Click and hold to connect British Museum and House of Parliament. A red line is made.
An X is formed. Sam says she's sure that is where the Daedalus club is - across Trafalgar Square.
Exit the hole.
The experiment went on at the new time without Helena. Angela recites a poem by Swinburne and asked that Sam finish reciting it. A test?
No incident happened at the experiment. Sam calls Eddie at the track to find out if an incident happened.
Sam rides the motorbike to London.
An incident occurs at the St. Edmunds Dining Hall.
CHAPTER 7
Terror in the Dining Hall:
Harvey calls Dread House and speaks to David.
David looks for Sam and is informed by Mrs. Dalton that she went to London.
St. Edmund Hall:
Jump to St. Edmund Hall. Enter the foyer.
Talk to the bulldog.
Go right across from the bulldog and enter the dining room. Look around.
Look at the wrecked room.
Talk to Detective Paiser.
Look close at hole on the wall. The hole is weird shape. Use discus on the hole. It fits perfectly.
Suspicions about Samantha:
Exit the dining hall. See Angela. She blames Sam and tells David that Sam is not a student here.
Talk to the bulldog and ask to check Sam in the database. Sam is not in the database.
Dread Hill House:
Sam's Bedroom: Enter the manor and go to Sam's bedroom. David picks up Houdini and puts him back in the cage.
Look around. Check the drawer left of the bed and click on the fake ID with Helena's name. See that it is altered.
Check the photo of the parents on the other side table.
Check the backpack. Read the letter from Foster Care in Virginia.
Check the Frankenstein book.
Telephone: Go down to the foyer and use the phone.
David calls Dept. of Foster Care. Learn Sam's life when she was 7 years old. David reprimands the woman that answered.
Mrs. Dalton: Go to the kitchen and talk to Stella.
Learn what Sam looked like when she arrived that first night. The Trojans were tickled pink with the horse too.
In the lab:
Main lab: Go down to the Main lab. Look close at the computer.
Select session 3. Use the + red square to make it 11:30. Click to add 30 seconds. There!
Note and click on Angela's scan. Click twice for David comments on the brain.
Click on the square at bottom left - MRI data sessions.
Select session 4. Use the + red square to make it 4:30. Click to add 45 seconds. There!
Note and click on Angela's scan. Click twice for David to comment about the brain.
Private lab: Enter the private lab.
Check the RNG machine on the work counter. See (click) that it now shows IMPOS.
Look close at computer. Click on My Files. Read Brain Power Report. David wants to compare it to the scans at Main lab. Click on Print at top left of screen. Get a brain diagram.
Main lab: Go down to the Main lab. Look close at the computer.
Open either session 3 or 4 and enter the time that showed Angela's brain scan flare.
Use the brain diagram on the brain scan. David says there's activity in her massa intermedia just before the flare.
Where is she now?
Use the phone in the foyer to see if Sam answers her cell phone.
St. Edmund Hall:
Go to St. Edmunds. See the Lambs Club. David returns Helena's ID card.
Learn from Harvey that Sam is a magician and she hangs out at the Black Wand Shop.
Get a call from Rose Hall of the Foster Care in Virginia and learn that Sam is gifted and not a bad person. She is a magician named Lady Byron.
Black Wand Shop:
Go to the Black Wand Shop. The shop is closed.
Check the poster on the window. See the command performance of Lady Byron at the Daedalus Club in London. Take the poster.
David calls Directory Assistance for the Daedalus Club address and is told that it is ex-directory. David wants a person that can pull private address.
St. Edmund Hall:
Go to the dining room across the bulldog.
Talk to Detective Paiser about Daedalus Club. The detective gives the address.
Daedalus Club:
See that Daedalus Club jump point is in the box at bottom right. Go there.
Knock on the door left of the theatre.
The trickster wants an invitation or token. Show him the poster. He knows David's name - Dr. Styles.
A masked man talks to David about Sam and a grand game in Oxford.
Lady Byron performs.
David confronts Sam. He doesn't believe that she is trying to help him.
CHAPTER 8
In the Lion's Den - The Game of Life:
Daedalus Club Front Hall:
Look around at Daedalus statue, the logo on the floor and the machines.
Exit to the public bar at the bottom of the screen.
Public bar:
Talk to the bartender. He doesn't know what happened at Oxford and Mephistopheles.
Talk to patrons sitting at left. Walk around in front of the empty chair in front of the patrons.
Talk to the Trickster behind the male patron at left. Learn that you have to puzzle out how to get to the private part of the club to see Mephistopheles. He says below, below.
Check the newspaper on the side of the empty chair by the patrons. Learn about the dining hall incident.
Daedalus Club Front Hall:
Go back to the right pass the bartender and to the front hall again.
Devil Machine: Check the Devil Machine at bottom left.
"Do you want to go below?" is written on the top of the machine.
Play the machine:
There are 2 horns on top and a lever on the left side.
Use the horns until you get 3 red devils. Pull once on the left horn and 3 times on the right horn.
When there are now 3 red devils a red light goes around the circle.
Pull the lever and the red light slows down gradually. Try pulling the lever when the light is at around 1 or 2 o'clock position.
Time the red light to stop on any of the 4 slots at the bottom under Hell.
A hole appears and Sam slides down to the floor below.
Hall of Hearts:
Look around.
Information box: Open the box under the painting at right. It says Cherchez la femme - Look for the woman.
Painting: Look at the painting and see 4 characters. Their hands are positioned oddly - like holding something.
Hearts Door: Go to the end of the hallway. Check the keyholes. There are 3 keyholes.
Read the sign on the top.
Life is a maze, endless misdirection
Like a master riddler spinning a tale
To win the game you must first learn to see
What is hidden from plain sight - Use the light
Then ask the bearers of life, the queens
Win by trial keys from three and give to the fourth
And you will be bourne up to your reward.
Look for the light:
Doors: There are 5 doors on each side of all halls. Only one on each side exits to the next hallway. The others go back to the same hall or some to the murky pool of the Queen of Spades.
For information only - Numbering from front to back: 1 to 5
Hall of Hearts:
Right #3 goes to Hall of Spades.
Left #1 goes to Hall of Clubs.
Hall of Clubs:
Right #1 goes to Hall of Hearts.
Left #4 goes to Hall of Diamond.
Hall of Diamond:
Right #4 goes to Hall of Clubs.
Left #2 goes to Hall of Spades.
Left #1 exits to outside the club into the street.
Hall of Spades:
Right #2 goes to Hall of Diamonds.
Left #3 goes to Hall of Hearts.
Life is a maze, endless misdirection
Like a master riddler spinning a tale
Hall of Hearts
Hall of Spades
Hall of Diamonds
Hall of Clubs
Queen
Queen
Queen
Queen
← Outside
↔
↔
↔
↔
↔
Hall of Clubs:
From Hall of Hearts, enter through left door #1. Look around.
Painting: Check the painting. The characters look like they need to be holding something.
Check the bunnies and classical statues of Artemis and Atlas.
Hall of Diamonds:
From Hall of Clubs enter through left #4 door. Look around.
Painting: Check the painting. The characters are pointing up.
Information box: The information box is a glass window between doors 2 and 3 at right wall. It has a card that states: Don't believe everything you read.
To win the game you must first learn to see
What is hidden from plain sight - Use the light
Switch: Check the switch at center of the room. It has a warning - Don't push me. Remember the information box.
Click to turn on the switch and the lights changes.
Painting again: Check the painting now and see that the characters are pointing to clues.
Left then right - alternating wins the game.
Choose the exit that shows your prize furthest away.
Always go left. Always go right.
Hall of Spades:
From the Hall of Diamonds, enter left door #2. Look around. Check the chainsaw box.
Iron Maiden: Open the Iron Maiden. It is the information box. It says Quitting is an option; ask the six of diamonds. Note that door #5 is right of the iron maiden.
Painting: Look at painting on left wall. The characters are holding props.
Gun: Check the gun case on left wall.
Handcuffs: Check Houdini's handcuff at back center of room. Take the handcuffs.
Hall of Hearts:
Go left door #3 to Hearts hall.
Check the painting and see that the characters are holding classical books. One is holding a spade card.
The harpsichord became small in this light.
Then ask the bearers of life, the queens
Win by trial keys from three and give to the fourth
Queen of Spades:
Enter right door #3 to Spades hallway.
Enter the far door to the Queen of Spades. The doors are locked.
The ceiling with spikes descends. Note that the ceiling looks like a globe with continents.
The floor opens and Sam slides to the Queen of Diamonds Hallway.
Atlas: Go through right door #4 to be back at the Hall of Clubs.
Go to the classical statues at back of room. Remember the clue on the painting in Hearts Hall.
Click on Atlas. Click to push Atlas. Sam pushes it to the Queen of Spades room.
Go back there through left door #4 and be at Diamonds hall. Then go through left door #2 to be in Hall of Spades.
Enter Queen of Spades door at far end again. The ceiling descends again. Atlas did the trick.
Click on Atlas twice. Take the purple key. Exit the room.
Exit:
From Spades Hall, go through right door #2.
Remember the note seen in the iron maiden mentioning #6 door at Hall of Diamonds and the #5 written on the door right of the iron maiden.
Go through left door #1 (which is across the door that is supposed to be #5). Be back out the street.
Go back inside the club. Talk to the trickster.
Go back to the club's front hall at right. Do the Devil machine again to go back to the basement at Hearts hall.
Hall of Clubs:
From Hearts hall, go through left door #1 to be Clubs hall.
Painting: Check the painting and see that the characters are holding weapons. There is a Queen of Hearts card.
Queen of Clubs:
Go through the Queen of Clubs door at far end. See the green key on a pedestal at the center checkerboard.
Click on the planks on the murky pool. Click again to see holes on the planks. Click again to see that it moves around.
Use the handcuffs on the planks to hold them together. Walk the planks to the pedestal. Take the green key.
Take the handcuffs back from the planks. Exit.
Queen of Diamonds:
From Clubs hall, enter left door #4.
Exits: Go through the Queen of Diamonds door at far end.
There are 2 exits. You have to make the correct choice of exits.
Select the exit that has the shorter pedestal 7 times.
Take the orange key from the pedestal at the center of the room.
Helena: Exit through any doorway and see Helena behind 2 exits.
Again, select the correct exit to Helena.
Select the skinnier Helena and go there. Tell Helena to "Stay Still".
Do the selections until you have Helena in front of you.
Talk to Helena. She is a friend. She came here to warn Sam only and is not associated with Mephistopheles.
Queen of Hearts:
From Diamonds Hall, take the right door #4 to Clubs hallway. Enter right door #1 to be at Hearts Hall.
Go to door at far end. Use the 3 keys on the keyholes.
Enter through door. Look-click on Mephistopheles. Sam wants something to coerce him.
Gun: Go back outside. Go through right door #3 to be at Spades Hallway.
Go to gun cabinet at left. Take the gun.
Mephistopheles: Go back through left door #3. Enter the Queen of Hearts door.
Use the gun on Mephistopheles.
Watch a great magician perform with possibly no props - the real thing.
See the RNG machine read IMPOSTOR.
The magician is the one in the picture. Note the tie clip.
Sam knows who is behind the incidents.
I'm Laura Styles:
See David have a visitor wearing the missing white dress in his bedroom.
David covers Sam.
At Christ Church Cathedral, watch the events.
In inventory, combine the paper fairy and lantern.
Use the lantern with paper fairy.
Use the switch left of the window.
Fairies can fly.
Watch the Lambs Club and David.
Research; lots of research.
The Bride of Frankenstein
This document may not be distributed without express written permission of the author and the content may not be altered in any way.
For Questions or Comments on this Walkthrough,
Please write to: MaGtRoCopyright © 2/2011 MaGtRo